Thursday, July 31, 2014

An App to Help Level Your Library

Hey, everyone! Today was our first official teacher workday, so the crazy back to school rush is in full swing around here.  I wanted to do a quick post to share about a new app I discovered to help level my classroom library. 


The app is called BookScanner and it's name says it all - it scans books! 

I downloaded it in a moment of desperation in my classroom last week when I had a huge pile of books to level and very little time. I was really pleased at how well it worked!


Just click the Scan Barcode at the bottom of the app, hold your phone's camera over the barcode and listen for the beep. I'm not gonna lie, I was channeling my inner librarian with all the scanning! 


Here is a screen shot of the info you get when you scan a book. We use AR at my school, so I like to level my books by AR level and this was so much faster than typing them all in the AR site. 

I also like that I can scan books at the library or out at garage sales to get a detailed run down of the book's level. 

Have you tried this app? Do you have a book scanning app you like to use? 

Monday, July 28, 2014

Last Monday of the Summer {Monday Made It}

This is my last Monday off this summer. I go back to school on Thursday and the kiddos come back on August 6th. Yikes! I can't believe it's already time and I'm not quite ready yet. I've been working in overdrive to get through my long to-do list and that means I've been making some things, so I get to link up with Tara for this week's Monday Made It! 


I'm gonna spare you the very boring paperwork, tedious to-the-minute lesson plans, and copies I've made this week! I'm also still hoping there is a little classroom fairy that will be visiting me this week. If you see her please tell her I'm waiting....


I've been spending a lot of time in my classroom working on getting things in order. I've been using my Silhouette to cut out some bulletin board letters. 


This one will be for the display where students will store their brag tags. 


This one will go on a narrow little window on the door in my classroom. 

The font I used is my favorite bulletin board font of all times - MTF Jumpin' Jack


I am so excited about having the beginnings of my bulletin boards up. I have to share just a little sneak peak. 


Remember the rocking chair? I found the green cushion at Pier 1. 


I gave this little Back to School Freebie a face lift this week. 


Click on the picture to download it! This was one of my favorite activities to do with older kids on first day of school! 


And finally I have a home made it. 


I canned green beans! I think fresh green beans are the prettiest shade of green. Really, I think they should be their own paint color. Don't you?! It's just a happy color. 


These are gonna be so good when it's snowing outside! 

Sunday, July 27, 2014

Come Check Out My New Blog Design

I am so excited to share my new blog design with you all!! I'm in LOVE! I keep clicking over to my blog just so I can look at all that owl and polka dot cuteness. 

Courtney over at Blogs Fit for a Queen  did the design for me and I couldn't be happier. She did a fantastic job and she was so great to work with. If you are in the market for a new blog or a redesign check her out! 


Monday, July 14, 2014

Rocking Chair and Brag Tags {Monday Made It}


It's a rainy Monday here in Virginia, so I'm using my time inside to catch up on some blog reading. I'm also linking up with Tara from 4th Grade Frolics for the fabulous Monday Made It linky! 


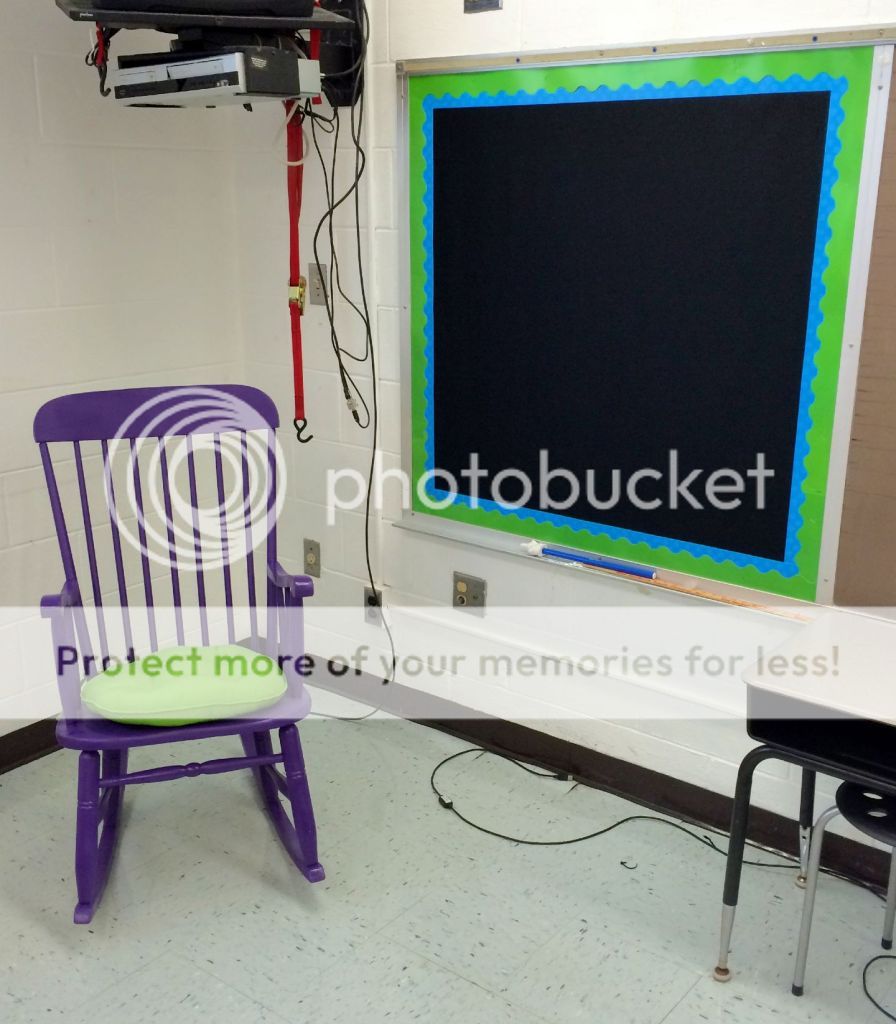
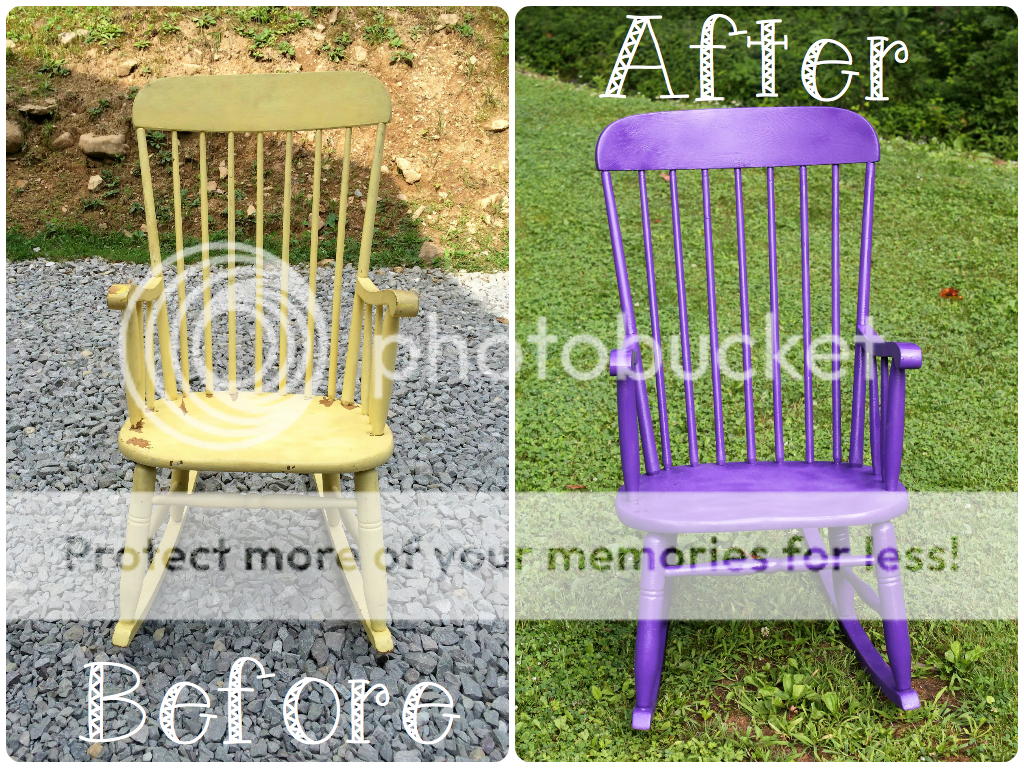
Ta da! The purple rocking chair is finished. I bought this chair for $30 at a craft show last fall, hauled it on a bus back to my car, and just stuck in the corner of my bedroom when I got it home. Sometimes I just have to let things sit and a plan will come to me. After I got word that I was moving from 4th to 1st this year I knew just what to do with this chair - paint it and move it to my classroom! 

The funniest part of this redo was the conversation I had with my husband. He was at work and knew I was painting the chair, but he had no idea what color. Here is what happened when he got home: 
Hubby: You sure did change the color of that chair. 
Me: Yup.
Hubby: Where are you planning on putting it? 
Me: In my classroom. 
Hubby: Good. 

Haha!! Bless his heart. He would've let me put that purple rocking chair back in our house, but I think he was kinda dreading the idea of looking at it every morning when he got up! 

I'm going with a bright color scheme in my room this year with green, blue, and purple as my main colors and some accents of orange and pink. It sounds good in my head, sometimes, I just hope it all comes together.

That brings me to needing some help from you. This chair needs a cushion. What color do you think I should use? I was hoping to find something orange?!


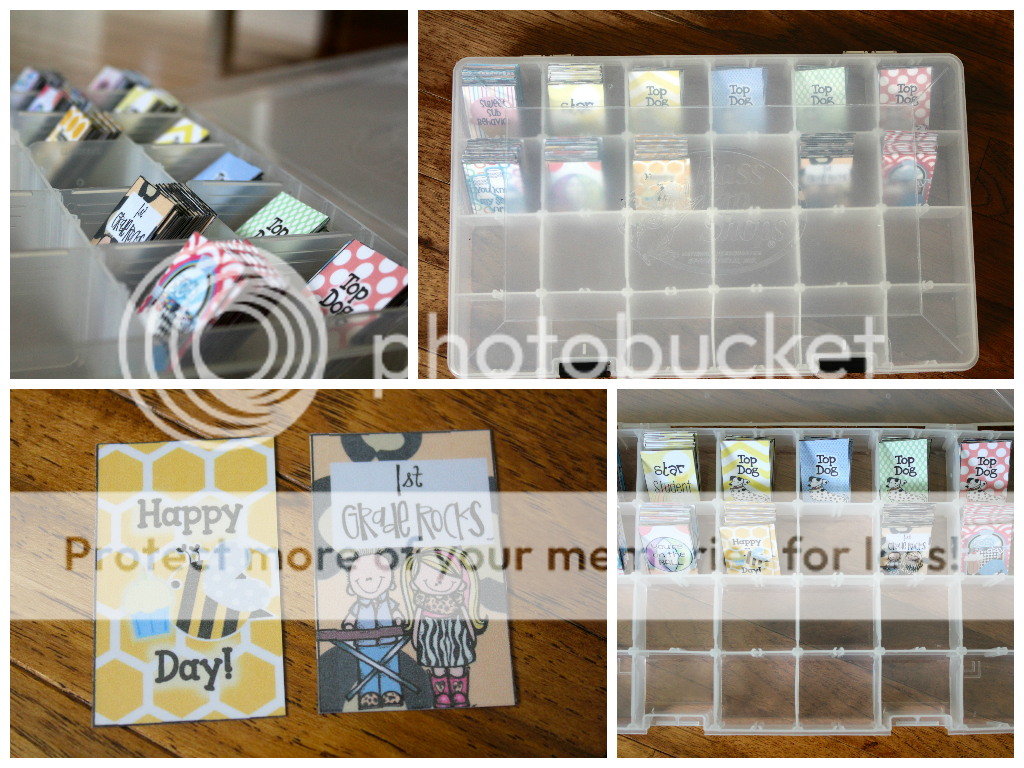
Can I count this as a MMI because I cut out these brag tags? Last week Miss Nelson posted about her new set of brag tags in a MMI post and I got so inspired. I'm looking for more ways to motivate my students and these cute little tags were the perfect fit. 

I used a tackle box from Bass Pro to hold the tags I'd printed and cut so far. I'm in love!! Look at that little bee how cute! I seriously want to make myself and necklace and just wear it around the house! If I'm this excited about it I can only imagine how my little firsties will feel about them. 

You can check out Miss Nelson's post about brag tags here and shop all her adorable brag tags in her TPT store.


So what have you been creating this week? Click the picture above to head over to Tara's blog and link up. Don't forget to leave me a comment with your suggestions to dress up my chair! 


Saturday, July 12, 2014

Fun in the Sun and Water {Saturday Snapshots}


I've spent this week doing a whole lot of summer and very little school and it's been very enjoyable. I wanted to share some pictures from the week, so I'm linking up with Miss Nelson for her fantastic Snapshot Saturday linky. 

My camera has been busy this week! We've had a family cook out, a day playing in the creek, and a pool party! The kiddos in these pictures are my cousins' sweet, adorable children. 


Stella did not want to get wet, but she didn't mind getting her daddy wet! 


I love how excited Gracie was about blowing out the candles on her cake! 


Tuesday, July 8, 2014

Printing on Washi Tape and Cutesifying Your Calendar {Tried it Tuesday}


I've not yet joined in on the Tried it Tuesday fun this month, so I thought today's post would be the perfect fit for Holly's link up. 

Yesterday I posted about my new teacher planner and I got several questions on my blog and on Instagram about the labels in the pictures. 


Not labels or even stickers. That is washi tape that I ran through the printer. It is a match made in heaven - washi tape and my favorite fonts!! Woo Hoo!! 

This was not my idea, so to get the whole scoop on how to do this you need to visit A Girl and a Glue Gun. While you are there reading the tutorial you should follow her blog. She is funny and so creative. I love to see all the neat projects she comes up with. 

It was super easy, so of course I had to do a LOT of it. I did find that it worked better on true washi tape (it's more like paper) than the Scotch Expressions Tape. Don't get me wrong, the Scotch tape is super cute, but it has more of a plastic, smooth finish and the ink rubbed off a little easier. 

What else do I use to cutesify my planners? 


More washi tape. This one was preprinted, so I used it to block out Christmas Break.


I like using washi tape in my EC Life Planner too. I use it to mark big events or sometimes just to make things pretty. Stamps and stickers to make things fun. The photo sticker and rectangle stickers in these pics are from EC, but I use all different types of seasonal stickers and just fun things I find here and there. I used to be a scrapbooker, so I like to use some old scrapbook supplies to jazz things up. I use mine as a sort of mini journal, so it's fun to add some color and personality to it. 
I plan on getting a little more creative with my teacher planner this year, so I guess that means I'll need to buy more washi tape. Darn.... 

Do you decorate your planner or calendar? What are you favorite decorating tools? 


Monday, July 7, 2014

Teacher Planner in a Discbound Notebook {Monday Made It}


It is a summer Monday for sure. I seem to be working in turtle speed, but at least I'm getting somewhere! I'm excited to link up with Tara from 4th Grade Frolics for Monday Made It. I've been a little slow with the making this summer, but I'm starting to catch up!

I finished my teacher binder/planner for the school year and I can't wait to show it to everyone! The calendar and other planning pages are from this Black and White Editable Teacher Binder set by Haley O'Connor. 


I've discovered discbound notebooks and they are this school supply lovers dream!! I have to stop myself from telling random, uninterested people about this notebook. I'm so glad I've got my teacher peeps here who like hearing about new notebooks as much as me! 


Just some random shots of the cover and some sections inside the notebook. The different sections are: 
Plans, Standards, Calendar, Student Info (parent contact info, contact log, student information sheets), My Info (logins and passwords, professional development log, etc.), Notes (from meetings, lined paper for lesson ideas) 


What is a Discbound notebook? The binding of the book is actually little discs. The pages are punched with a special hole punch and then they fit right over the grooves in those discs. You can add, remove, or rearrange the pages at any time - I love that!!  


The punches kinda look like little mushrooms and I may or may not have a lot of tiny mushrooms on the rug around my desk. The pages are surprisingly secure in the notebook. To get a page out of the book you start at the top and peel it down towards the bottom. I love that the pages can be moved around yet it is still more compact than a binder. 


Want to give discbound books a try? Here are three simple supplies you'll need to get started: 

Discs - the green discs on my notebook are 1" discs from Staples. Each letter sized notebook needs 11 discs.

Notebook shell or covers - my cover was customizable and came with 8 different inserts for the covers

Hole punch - I ordered a travel hole punch from Amazon. It only punches one sheet at a time, but it was much less expensive than the desk punches and I can carry it in my teacher bag. 


That's all you need to get started! The notebook shell I bought had 1/2" discs that I didn't use, so I already have enough materials to make another notebook if I want. I love all the options there are to customize these notebooks! The hole punch will punch card stock, so I see a lot of cover making projects in my future! 

Supplies can be purchased at Staples, Levenger, Amazon, Rollabind, and Etsy! 


Related Posts Plugin for WordPress, Blogger...