Monday, June 30, 2014

Amazing Bread and Peach Slush {Eating, Drinking, and Linking}

Anybody else planning on doing some celebrating later this week for the 4th?! We are gearing up for a big get together with family and friends and you know what that means - food!! Eating and cooking really seem to be the only two things I'm getting done this summer...at least it's enjoyable!


I'm linking up with Christy from Teaching Tales Along the Yellow Brick Road to share a couple recipes I'll be making this week for the celebration. 

Drop everything and make this Cheddard Tailgaiting Bread!! The recipe has been floating around Pinterest for a long time, but I just now got around to trying it and it is fantastic! 

I didn't take any pictures of the bread because I was too busy eating it, but you can click the link above or check it out on this Pinterest board - it's the first pin!


The other recipe doesn't have a picture either - just more proof that it was too good to stop eating long enough to take a picture! 


2 cups sugar
4 oz. lemon juice
2 packs peach jello
1 - 46oz pineapple juice
6 1/2 cups water
ginger ale

 In a large bowl mix together the sugar and jello. Boil 3 cups of water, add to jello and sugar to dissolve. Add remaining 3 1/2 cups of cold water, lemon juice, and pineapple juice. Divide the mixture into 2 gallon-size ziploc freezer bags. Lay flat to freeze. Thaw 2-3 hours before serving. Mash up in the bag and mix the slush with ginger ale - 2 bags of punch to 1 liter of ginger ale. 

What yummy recipes have you tried lately? 


Saturday, June 28, 2014

Summertime Saturday Snapshots


One of my favorite hobbies is photography, I just don't have a chance to practice play during the school year like I'd like to. I've taken some time this week to break out the big camera and take some snapshots of our summertime farm life. Warning: There is nothing educational in this post, but if you love animals keep scrolling!


I'm linking up with Miss Nelson for  Saturday Snapshots. 


Charlie is also my photography guinea pig. He's so hard to take a picture of because he's black so he just shows up as a little blob in most pictures! 


Pretty sure Gunner is the most photogenic dog in the whole world. He also poses and he's pretty good at that too. 


This is Sport's I didn't do a thing look. He has to use this one often because he's always doing something! 


The ultimate love-hate relationship. Sport loves the cat and she always tries to get away from him..hrmm...wonder why? 


This happens every evening in our front yard.


Sweat that the horses then try to rub off on us! They're just really big pets. 


My beautiful Nellie. She mostly just gets to hang out and eat...my kinda life. 


This happened last night and they were fantastic. It was hard not to just eat them all! 


The lambs are about 3 weeks old now and they are so much fun to watch. They are super quick and love to run all over the field playing with each other. 


My favorite view in the world! 


Thanks for indulging me and looking at all my little (and big) kiddos. This was fun. Maybe I'll do it again next week. 

Monday, June 23, 2014

Blast Off VBS Decorations {Monday Made It}

This is the 200th post on my little blog and I'm so excited that it happened on Monday Made It day because it is my all time favorite linky party!! 

Enough celebrating, time to get down to business with Miss Tara over at 4th Grade Frolics


This is my first time getting to link up for MMI this summer and I'm so excited because I get to share some snapshots from our VBS decorating. You'll have to forgive me for the poor picture quality. I was in such a rush trying to make sure I had all the supplies I needed yesterday and I forgot my camera. 

We always choose to make one big, focal piece for our decorations and this year we just knew it had to be a rocket. 

So how'd we do it? 


Tum-E Yummies, anyone? We were GIFTED these three drink displays and they made the perfect base for our rocket. We just assembled the displays, stacked them on top of each other, and used some duct tape to hold them in place. 

We added some silver wrapping paper to the front and red and yellow tissue paper around the bottom for the flames. For the top we used two pieces of red poster board taped together and cut out a cone. 

This was one of the easiest and least expensive decorating projects we've ever done. I love the way it turned out! 


Here is a shot of the stage area. We used gossamer from Oriental Trading to drape the back wall and then added some more stars from OT to finish it all off. 


Here is the view as soon as you come into the church. I just love all the twirly star and planet decorations we added.  


Remember those posters I had printed at Office Max? We used them downstairs to add a little color to the walls. We also used these really neat wall decals in the hallway and dining room downstairs. 


I thought someone might be interested in seeing what the packaging looked like. These came from Wal Mart and I think they'd be fantastic in a classroom!  I'm always getting classroom ideas when we decorate for VBS. 

What have you been creating? Link up with Tara so we can all hear about it! 


Friday, June 20, 2014

Week 2 of Summer Break {Five for Friday}

Happy Day! It's Friday and my sister is here!! 
Time to link up with with Doodle Bugs Teaching to share some randomness from my week. 


Vacation Bible School starts on Sunday!! I'm so excited!! VBS is one of my all time favorite church activities and I'm directing again this year. We're gonna call this the before picture. It really reminds me of my classroom in the summer before I start putting it all together. Stay tuned for more pictures! 


We cut hay this week! If you have the need to cut hay then you know what a relief it is to finally get weather nice enough to cut it and get that stuff put up. We still aren't completely done with the first cutting, but at least we got some of it taken care of. 


It's been a relatively quiet week around here, so I've had some time to relax and enjoy being on break. I've been hanging out near the creek behind our house some. 


Ladybug has been hanging out with me. 


And these guys. I guess you can tell by looking at them that they don't hang out in one spot too long, but I'm enjoying getting to spend some extra time with them! 


I went to a little Mary Kay get together this morning with some teaching friends. It's so nice to get to spend some time with them outside of school! Lots of fun. 


My sister is here!! She just got in this afternoon and I'm so excited to get to spend some time with her this weekend!! Yay for sister time. 


Tuesday, June 17, 2014

Need Address Labels for Projects and Back to School? I Found a Deal!


Address labels are always on my back to school shopping list. It seems like every time I go to Wal Mart in August I pick up a pack of labels and those things aren't cheap.  
I print out sheets of them with my kiddos names already typed up. It is a super easy way to label supplies at the beginning of the year. 
I recently discovered a website that has an amazing deal on labels! It's kinda sad that I'm so excited about this deal, but I knew I could share my excitement with my teacher friends and you'd all be just as happy as I am! 
This company does not know I exist. I just wanted to pass long a good deal! 

I usually use Avery labels from Wal Mart.  I just went online and checked the price of the labels I usually buy - 750 Avery 1"x 2 5/8" for $14.27. 

At Online Labels you can get a pack of 3,000 labels of the same size for $10.45 and $4.95 shipping. That is a CRAZY good deal. 

Of course these aren't Avery brand, but I did have a chance to test them out when I did some printing for my mother-in-law.  I printed on these labels using a document I'd created with the Avery templates and they looked great!  I couldn't show you a picture because I was actually using them for addresses - gasp


This is the pack of 7,500. I like the little plastic box they are in. The lid closes easily and it is easier to get to the labels than the cardboard Avery sleeves. 

The site also has templates you can download and use to create labels.

What do you use labels for in your classroom? 

Saturday, June 14, 2014

Printing Classroom Decor at an Office Supply Store

I had my first Office Max printing experience this week and I thought I'd share some thoughts. The closest office supply store is 45 minutes away from me, so I was very new to this whole printing thing and I had questions. I couldn't really find the answers to my questions, so I found out for myself and wanted to share them in case someone else was wondering the same thing. 

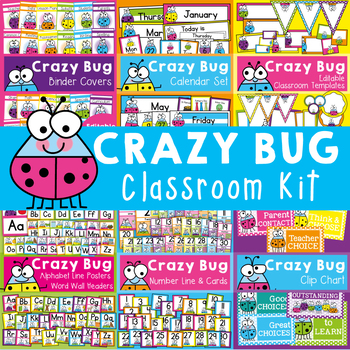
I love the classroom decor sets that are sold on TPT. They are original and created by classroom teachers, so you know they are going to include what you really NEED for your room set up. 

I only had one problem - how would I print it all and get it to look as beautiful as it does on my computer screen? I decided professional printing would be the best way to get the results I was looking for. I was just a little unsure about the cost and how I would like the finished product compared to materials bought at the teachers supply store. 


I had 81 color pages printed on 80# card stock. 


It was a total of $53.46 for the color printing. I had a coupon for $15 off a $50 purchase, so that really helped to lower the cost. 

The first thing I noticed when I picked up my order was how vibrant the colors are! They are much brighter than what I was able to reproduce at home and they are an exact match to the colors on my computer screen.


Here is a little color comparison for you. The big card on the left was printed at Office Max and the little card was printed at home, both of them on card stock. You can see the color on the left is a lot more vibrant. 

The card stock quality is also much better than what I had at home to print on. This card stock had more of a glossy finish. 

What did $38.46 buy me? 

alphabet line cards 
number line cards
calendar set 

Was it worth the cost? I absolutely think so! I now have unique classroom decor and the exact pieces I need, not a lot of extras from a kit that I won't use. I did some comparison shopping and determined that this was actually cheaper than purchasing the same items at a teacher supply store. 

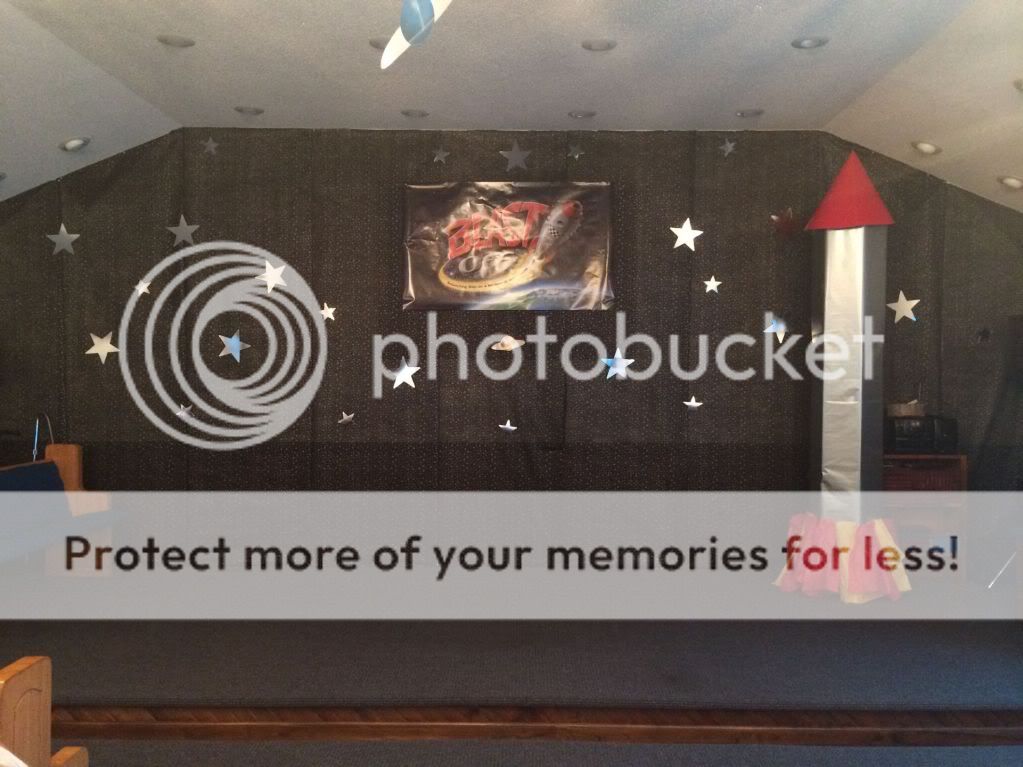
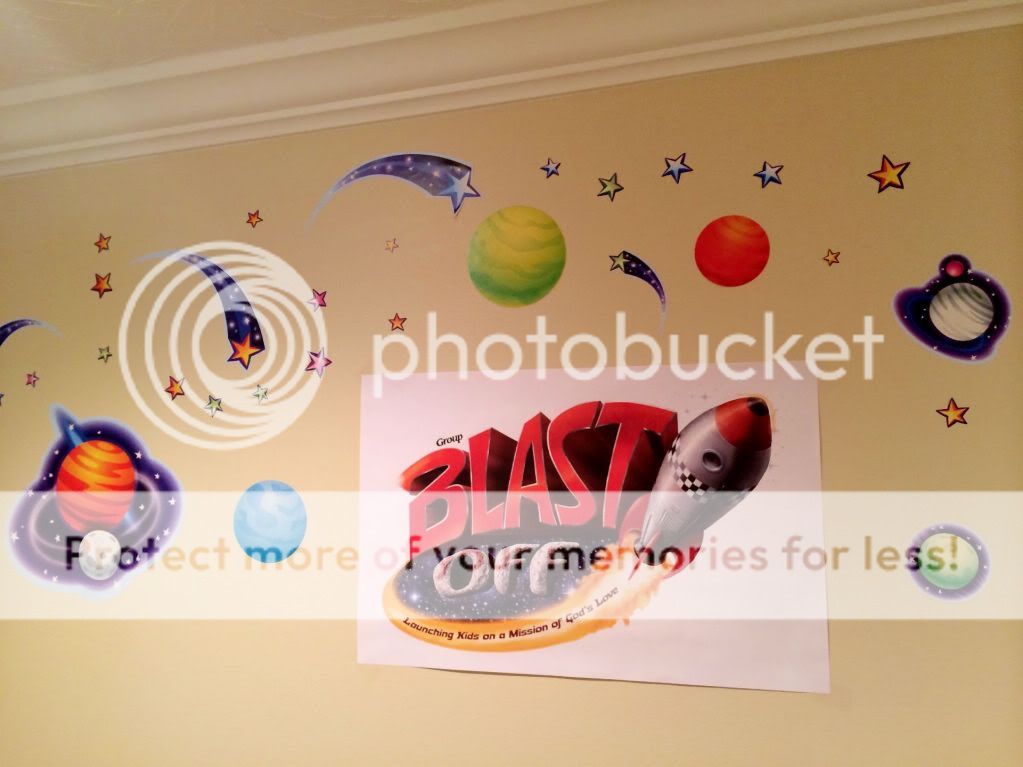
I also tried out the 11x17 poster prints while I was at it. 


The 8 posters I got were for VBS and they turned out great! I just had the images printed on a white background so they would stand out, but this would be perfect for printing classroom posters. They were at steal at $1.18 each. 

My tips for printing at an office supply store: 

  • Call first and talk to someone at the print desk. I found it much easier to get prices for products and services over the phone than online. 

  • Email your order. When you call be sure to get an email address. I first tried uploading my order online and the system said it wouldn't be ready until next Monday, but the lady I talked to at the store said an order that size order would be ready in 10 minutes! 

  • When I emailed I was able to give instructions on which pages I wanted printed from each file. That meant I saved a lot of money because I didn't have to print cover sheets or credit pages. With the online upload there is a way to do page exceptions, but I found the whole process to be very slow. 

  • Look for coupons. I chose which store I printed at based on who had a coupon this week. When I paid for my order I got another coupon for $10 off a $40 order that starts on Sunday. That's a good thing because I'm hooked on this! I don't want to print anything at home now!! 


Do you have any tips to share with me? 


Friday, June 13, 2014

Welcome to Summer Edition {Five for Friday}

This was my first full week of summer!! I wanted to stop in with a few picture updates of what I've been doing this week! 


Head over to Doodle Bugs Teaching and join up! 


Just call me the bag lady. My cousin and I started up a Summer Food Program for our community last year and we kept it going this year. Churches from the area pick a week to sponsor and they provide nonperishable breakfast and lunch items for the week in these grocery bags. The bags are picked up at specific locations on Mondays. This past Monday was the first drop off of the summer! I'm so thankful God has blessed us to continue this ministry! 


Let the summer reading begin!! How could someone have been reading this series since the first book came out 20 years ago?!!? I would've gone crazy by now wanting to know what happened. Thankfully I just started reading a couple years ago, so the wait wasn't too bad. Any Outlander fans out there? 


I decided on a theme for my classroom next year! Aren't these crazy bug by From the Pond adorable??

I'd already been thinking theme and this was on sale Tuesday and I just couldn't pass it up. Good thing I've got a start on it now because I have plenty of work ahead of me with the grade change. 


I also made a little trip to the teacher store to pick out borders to match the bugs. I decided to go with a double border (the blue has polka dots). I plan to use purple, orange, yellow, and pink for accents. I already have a lot of blue and green in my classroom, so I thought it'd be easy to work these in. 


The bestie and I had a little shopping trip to kick off the summer. Isn't she just rockin' that hat?!

She helped me shop for the summer food program (my church sponsors next week). 


We went to Sam's Club, so I had to check out the school supplies. I got 200 laminating pouches for $20.98 and 200 sheet protectors for $9.98. Pretty good deals I thought and that'll get me started on a few other summer projects. 


Ever wonder about color printing at an office supply store? I had all this printed this week. Check back tomorrow for a post all about it! 

What have you been up to this week? 


Related Posts Plugin for WordPress, Blogger...