Showing posts with label classroom management. Show all posts

Saturday, October 19, 2013

Grading Homework {Spark Student Motivation Saturday}


Happy Saturday, everyone! I am off to a craft festival today with my mom and sister, but I wanted link up with Joanne at Head Over Heels for Teaching to share a quick motivational discovery I made this week. 

I decided to have my students grade their own ABC Order spelling homework papers on Thursday. We had the time and I didn't need one more set of papers to grade with it being the end of the grading period! 

Wow! You'd have thought I'd let them do something really special. They loved it! I really wasn't expecting them to be so happy about it. The novelty of using an ink pen was partly to blame here I think, but whatever works, right? 


Those few students who didn't have their homework looked really disappointed, so I'm hoping this will be motivation for completing it on time! 

They were also fascinated by my stamp that I hadn't used in several years. It came from Vista Print as a freebie once upon a time. I always like to use it when we check papers together in class, just so parents are kept in the loop. 


This one did double duty - motivating for the kids and less grading for me! That is a win, win!! 

Do you have students check their own papers? Any tricks to share with me? 

Tuesday, October 8, 2013

Student Desk Drawers {Tried it Tuesday}

Hi everyone! I'm back to link up with Holly from Fourth Grade Flipper for Tried it Tuesday! I love reading about all the different things teachers are trying in their rooms. 

A new thing I tried at the beginning of this school year was desk drawers. I'd seen the idea of using the lid to a copy paper box as a desk drawer on Pinterest. I thought it would be worth a try, so I sent out an email to all my fabulous coworkers and within a few days my room was full of box tops! 

Since I teach 3 different ELA groups each day, I wanted a convenient way to store their journals, vocabulary folders, and writing notebooks. Instead of carrying these materials from class to class and losing them, my kiddos just keep their stuff in the desk drawer. That part of it makes my life so much easier because I'm never holding class to wait on a student who has forgotten a notebook. 


After 9 weeks of use by 4th graders they are still holding up nicely. You can see from this picture that they are sometimes a doodle magnet, but that's no big deal for me. 


The inside looks pretty neat too. There are only 3 folders, 3 notebooks, 3 composition books, and one file/privacy folder in each drawer. The kids have done a really good job of being respectful of each others "stuff" in the drawers. 

My favorite part about it is that my homeroom kiddos can no longer stuff those desks full of papers and junk that shouldn't be there. Since there is not extra room in the desk no one can leave "goodies" that might tempt those with sticky fingers... 

Have you ever used desk drawers. What did you think? Any tips for me? 

Tuesday, September 10, 2013

Vocabulary Transitions and Group Supplies {Tried it Tuesday}

Hello, blogging world! You know what really bugs me? When I give directions and before I even get half way through what I'm about to say I have kiddos who have tuned me out and are already doing what they THINK they are supposed to do.

Does that every happen to you?

Then I find myself repeating the same things over and over because Johnny wasn't listening the first time. Drives me up. the. wall.

Sunday was a night of discoveries for me. Thanks to Facebook I found a great new blogger to follow, Third Grade Thoughts.  Stephanie had written a great post about her word of the day vocabulary system and she included this amazing video.
I really hope you'll take the time to watch the video, but I'll give you the gist of it in case you're pressed for time. Basically, you say, "When you hear me say the word of the day you will put away our homework folders and take out your journals. {Word of the Day}"

The word of the day becomes your cue word for action, it allows them exposure throughout the day, and it forces students to listen to your instructions so they will be sure to hear "the" word.

I went right into the classroom Monday morning and implemented this amazing idea and, so far, I'm loving it!

The other thing bugging me in the classroom has been passing out scissors and glue to students. I have my kiddos sitting in groups of four and we have community supplies for scissors, glue, and crayons. In the past I've always handed out these items to students individually. 

This year I have not two, but three classes I see and the constant taking up and passing out of materials is getting to be a little too much for me. My kiddos just aren't good with transition times yet (see above), so I THINK I may have come up with a solution. 


I got 6 zipper pencil pouches and put 4 pairs of scissors and 4 glue sticks in each one. When I want to give out these supplies I only need to hand one pouch to each table and we are done. Additionally, I appointed one person at the table as the supply helper, so that person gives the glue and scissors out. I have never seen children fight over glue and scissors like these do! You wouldn't think I'd laid gold coins on their tables they way scramble for them!! 

So far, so good on this one, too. We are able to leave the pouches on the tables for each class, so that saves me time.  like that all the supplies are together but I still have the option of moving them off of the table when I want to. 

I'm linking these tried its up with Holly from Fourth Grade Flipper

Side note - the last thing bugging me is blogger!! The darn thing WILL NOT let me align all my text the left!! grr....

What has been bugging you in the classroom (or otherwise) lately?


Monday, August 5, 2013

Sign, Restroom Passes, a Calendar, and a Freebie {Monday Made It}

Happy Monday! I'm back at work today, but I've decided to make it a happy Monday anyway! I've been very busy creating and making things to get ready for the start of the school year. I'm linking up with 4th Grade Frolics for Monday Made It to showya what I've got! 

I couldn't get past this quote and I had an extra canvas in the craft closet AND I was procrastinating, so I made this sign! 


I think it fits perfect on the shelf right behind my desk! I used my Silhouette to cut out the vinyl letters, spray painted over them, and then peeled 'em back off! It was way easier than I thought! 


Used some more vinyl to make these restroom passes. Am I the only person who had trouble getting the label to come off the bottle? I finally had to soak it in OxiClean! 

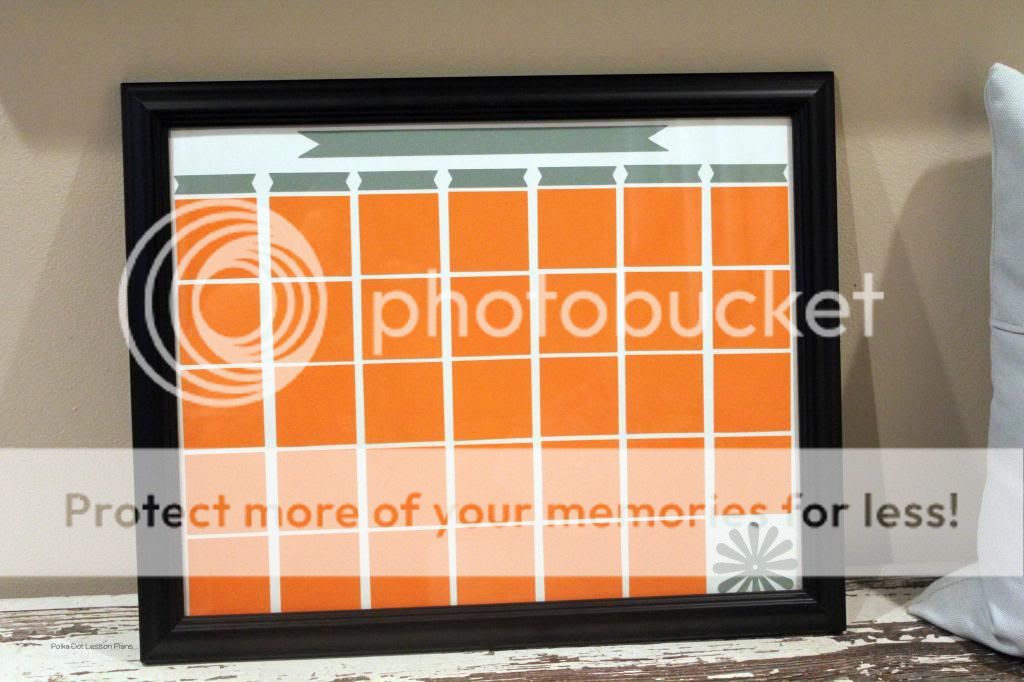
I made this calendar for my BFF, who happens to be a guidance counselor. She just moved into a new office and had some extra wall space, so I thought this would be perfect! 


Last, but not least, I made these great bracelet tags to give out at our Open House night. I made tags for PreK-6 grade. 


Want a set for your class? Just click on the picture to head over to my post from yesterday's VA is for Bloggers Blog Hop. While you are there click around to meet some other great VA bloggers! 


I'm going to miss my usual Monday afternoon sitting on the porch reading Monday Made It posts in my pjs! At least I'll have something to look forward to after work today! What have you created this week? 


Thursday, August 1, 2013

Clock Buddies {Thursday Throwdown }


Hi everyone! Today is my first day back at work! I'm excited to get the year started and look forward to seeing my teaching friends. Today is a special treat because we get to work at school ALL day without meetings! I don't know about you, but for me those inservice days before school begins are always packed with meetings! 
I'm linking up with I'm Lovin' Lit for Thursday Throwdown. This once monthly linky is for us to share ideas on how we make the classroom more interactive for our students. 

I like to have my students work with partners often! We will work with a partner at least 2 times a week and usually more often than that. I'm always looking for different way to pair up my students and one of my favorites is clock buddies! 

Students get a blank clock and have their classmates sign up for different times on the clock. Here is a picture from ReadingQuest.org of what a completed clock buddy sheet would look like. 


When it is time for kids to work with partners all you need to do is say find your 2 o'clock buddy and start working! It is so easy and saves so much time when pairing kids up! 

I like this method because it forces kids to mingle. Kids don't have 12 BFFs, so that means they aren't always going to be with the person they want to socialize with instead of work. Yes, there are always exceptions to this and some kids will socialize with anyone! 

This offers your students choice and there is always an element of suspense when I ask the kids to get their clocks. No one knows which time I will call! 

I got this great idea from a fantastic website called ReadingQuest.org. You can click here to go straight to the page that gives the scoop on clock buddies as well as the printable clock sheet I use in my classroom. 

If you haven't visited ReadingQuest.org before you really should head over and check it out. The site is labeled as being for Social Studies, but I've gotten some amazing reading strategies there! 


Saturday, July 13, 2013

DIY Teacher Planner {Optimum Organization}

Since posting the Teacher Planner I created for my Monday Made It post I've had a few people ask if I'd be willing to share the templates I used, so I thought this would be the perfect Optimum Organization post for this week.
Be sure to head over to Fun in Room 4B and Ladybug's Teacher Files to check out all the great links! This has become one of my favorite linky parties of the summer! 

Before I go further with the post it would be helpful for you to know that I keep my lesson plans online, so my templates do not include lesson planning pages. I needed to create a planner that would be small enough for me to carry home, to meetings, and have handy in the classroom. The planner will be used for long-term planning, keeping up with important events, meeting notes, and parent communication. 

You can click on any of the images in this post to download ALL the templates I used in creating my planner. 

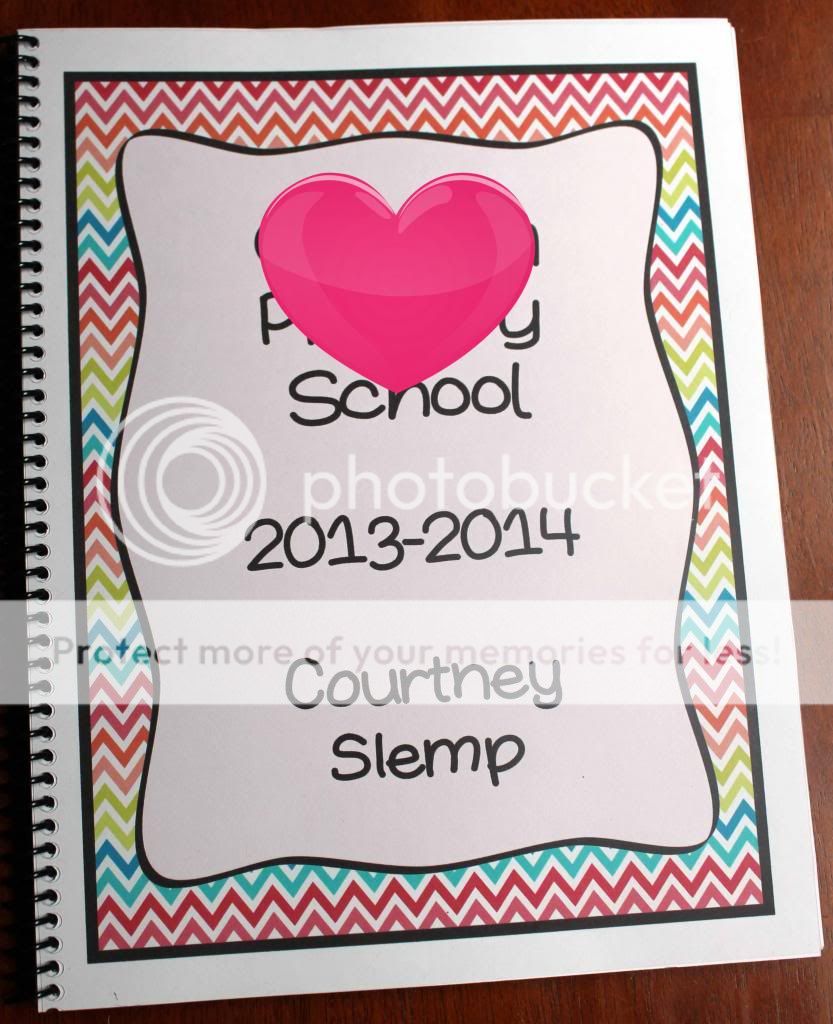
Here is a picture of the front of my planner.

In the front of the book I added a page for all those logins and passwords I can never remember! 


Here is a look at the inside calendar pages. 


In between each calendar page I added a notes page on the left and then a page with spaces for making notes for each of the 3 classes I teach. 

After the calendar and notes pages I added in a section with my pacing guide and standards. 


Next came the Parent Contact Log. I like to keep a list of all my parent contact information in a notebook with some space to document when I talk to a parent and what we discussed. This planner was the perfect place to add that in. 


I threw in some of the note pages from earlier to record my calls and conferences with parents.

The last page was the beautiful verse. 

You can click on any of the images in this post to download all the templates I used for creating my teacher planner. I even threw in a Birthday organizer, but ended up decide not to put that in my planner! 

Tips: 

I printed the pages front to back on my color printer. The process actually didn't take nearly as long as I thought it would have. I would recommend using a heavier weight paper than 20#. The lines show through to the other side of some of the pages, so I think a heavier weight paper would make it look a little more professional looking. 

I had mine bound at Office Depot. It was $5 for the plastic binding, a clear plastic cover, and a black plastic back. I think that is a great deal for a customized planner! 

Have you ever made your own teacher planner? Have any tips to add?! 


Thursday, July 11, 2013

{Throwback Thursday}

Since I'm still pretty new to the blogging world I've really enjoyed seeing all the posts from Throwback Thursday over at The First Grade Parade


I've noticed one of the first posts I ever wrote has been getting some more views lately and I wanted to share it for some of my new followers. 

Here is an explanation of how I have students turn in papers and also how I keep makeup work for absent students. 

If you are interested in reading more of the Tame the Paper Monster Series you can catch up on them here, here, and here.
______________________________________________________

Tame the Paper Monster Series 

Part 1 Student Papers


I have been battling with the paper monster since my teaching career began 7 years ago. I feel like I've tried every solution out there to dealing with the mounds and mounds of paper that seem to magically appear in the classroom.

I'll save you the recap of all the systems that came oh so close but never quite made the cut. I'm an organization lover (okay, I might have just a slight obsession with it) so having all these homeless papers floating around the room really bugged me.  Now after all my scouring teacher magazines and office supply stores I have hit upon the perfect solution (at least it is in my little world)! 

I give each student a number at the beginning of the year and we use it to label papers, books, mailboxes etc.  Well those little numbers come in super handy, so first things first - give all your little darlings a number. 

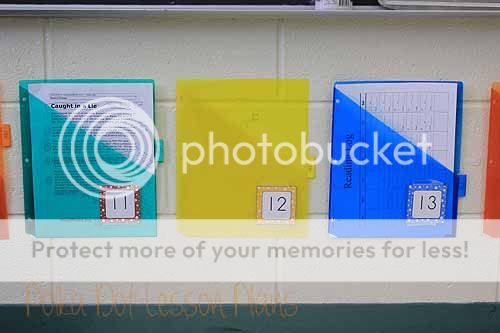
I went to Wal-Mart and picked up packages of slash pocket dividers for 3 ring binders and attached a number (from an old calendar set) to the front.  I used one little Command poster strip and stuck those babies to the wall under my chalkboard.  I also have a deep love for Command strips.  What can't those things hold up? These have been up in my classroom since before Christmas and are still holding strong on our cinder block walls. 


Now when students come into the classroom they have a place to put homework right away.  There are no baskets, check lists, folders or other fancy systems - just these little pockets.  Students place their work in the pocket with their number on it and ta da! - papers managed! 

Here are some reasons why I love these pockets: 
  •  In one glance I can see who didn't have homework to turn in. 
  •  When I pull work out of the pockets it is already in alphabetical order. 
  • When its time to put work into mailboxes the papers are already in order.
  • They are using up that dead space under my chalkboard. 
  • When I have a student absent for the day I stick whatever work they've missed in the pocket. When the office calls for Johnny's make up work to be ready at 3:00 and it's 2:58 I can swoop in like Super Teacher and have it all together! 
  • We have a rule - nothing goes into your pocket until you pick up make up work. 
  • No name? No Problem!  I can use my class list to see whose paper is missing the name. 
I do have a few thoughts about why this has been so effective for me and my students.  First of all the pockets are right under the chalkboard and easily visible to everyone.  I've tried them in the back of the room and students seem to ignore them back there and make up work stays there forever! 

They are clear, durable, and easy to use.  I've tried using file folders this same way (just staple the edges together), but it is more difficult to get papers into the file folder and they don't hold as much.  These little plastic sleeves of goodness (told ya I loved 'em) hold A LOT of work and it all looks neat - nothing is flopping out of the side of the pocket. 
Stick around for part two of the series when I'll reveal where papers go after they leave the pocket. 

Monday, July 8, 2013

Voice Level Chart, Teacher Planner, and Bandana Dress {Monday Made It}

Happy Monday! Isn't it great that Mondays are happy in the summer?! I'm just wishing the Mondays would come a little slower around here. My kiddos come back on August 8th - exactly one month from today! 

I've really been working hard to my to do list, so I'm linking up with Fourth Grade Frolics to share my goodies! 

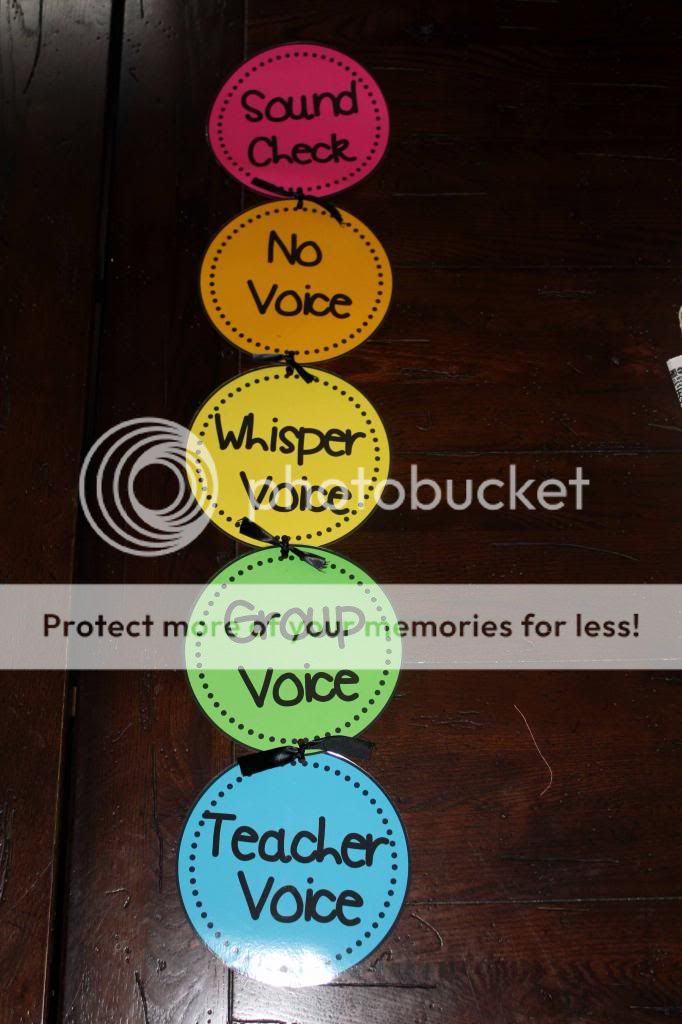
I'll start with a cute idea I've seen on several blogs and floating around Pinterest. I made this brightly colored voice level chart to hang in the front of my room. 


I really like the way it turned out. Now I just need to make some glittery clothes pins to use with it! The list just keeps getting longer! P.S. I made these with my Silhouette Cameo, so if you've got one and would like to have the cut file just shoot me an email. 

My Teacher Planner is probably my favorite Made It this week. I had it bound on Tuesday last week and it has been so hard for me to not share pictures! 

Please look over the heart. I just didn't want to advertise my school name. 


I do all my planning online, so I really just wanted a couple sheets for making notes in between each month's calendar pages. I also added in a section for my standards and a parent contact log. I'm loving it! 

I also "made" my first ever linky party! Click on the button to go check out all the great tips on departmentalized/team teaching! 


For my home made it I created this adorable little dress/tunic for only $3!!! It is made from two bandanas and a 2 1/2 yd piece of ribbon! You can read the whole tutorial here

What have you been creating? Head on over to link up and share your projects! 

Thursday, July 4, 2013

An Organized Desk and a Wondering Mind {Linky Party Double Up}

Happy Independence Day! The teacher in my lay awake in bed last night and wondered if my students would remember all the countless times I'd told them the real reason we have the "4th of July"?! Glimpses inside the mind of a teacher...sometimes scary!


                                                     Source: Uploaded by user via Heather on Pinterest

Now, on to the business of today's post. I'm doing double duty on this holiday and linking up with two fabulous bloggers! 

Organization is one of my favorite topics, so I knew I had to link up with Jessica at Joy in the Journey for this week's Tricks of the Trade link up. It's all about keeping your teacher desk organized! 


My must have for a teacher desk is my inbox. It is the collection place/drop box for all the important pieces of paper that need my attention. 

I ordered that adorable magnet from Vistaprint a few years ago and my wonderful mother gave me the Longaberger basket as a Christmas gift right before I graduated from college! 

The inbox is one of the first procedures I teach my students. Here are the things that students may put in my inbox: excuses, permission slips, notes from parents, late homework, and makeup work. I also teach students that if they come in tardy I will keep teaching and they need to place their tardy slip in my inbox, have a seat, and get in on the lesson. 

This box has helped keep me sane. I could count on one hand the number of papers I've ever lost (at school) because everything goes into the inbox. In the morning as students are arriving no one ever hands me papers that I will subsequently lay down in some random place.

I make it a point to go through my inbox every day (sometimes twice a day) and take care of anything that needs some action from me.  My goal is to always have an empty inbox by the end of the day. 

Okay, I know you can tell I LOVE that inbox....I could really just talk about it forever...it is that good. Oh and I've seen some pretty nice plastic containers at Wal Mart that would make a perfect inbox! 

I'm also joining up with I'm Lovin' Lit for the very first Thursday Throwdown. 


When I think of interactive I think of engaging students in conversation and deeper thinking, so I'm going to share something I tried with my class last year and we all loved! 

A few times a week at the beginning of the day I take 2 minutes and ask everyone what they are wondering. It could be anything. Some students wonder about class, recess, a special activity, a family member, and someone always wonders about what their pet is doing! I never put any "rules" to this wondering session, it was their time to share whatever they wanted.


Now, I'm sure you're wondering how this is relevant to learning? I want to send the message to my students that 1) this is a classroom for thinking and I expect them to wonder about things and 2) I WANT them to share what they are wondering about. I put a high premium on wondering and thinking just by asking this little question. 

When we were in the middle of a lesson, any kind of lesson, I would stop and say, "Hmm...I'm wondering..." and students picked up on this and ran with it. It is a fabulous strategy for getting kids to predict and question when reading. 

I feel like it made for a more engaging, interactive classroom community because it was sending the message that conversations about what you are wondering are encouraged in this classroom. 

It also does double duty as a way very quick, fun way to get to know more about your students! 


Don't forget to stop by tomorrow for my Team Teaching Tips linky party. 


Related Posts Plugin for WordPress, Blogger...